(Instructions and Tips are posted after last altered clock....)
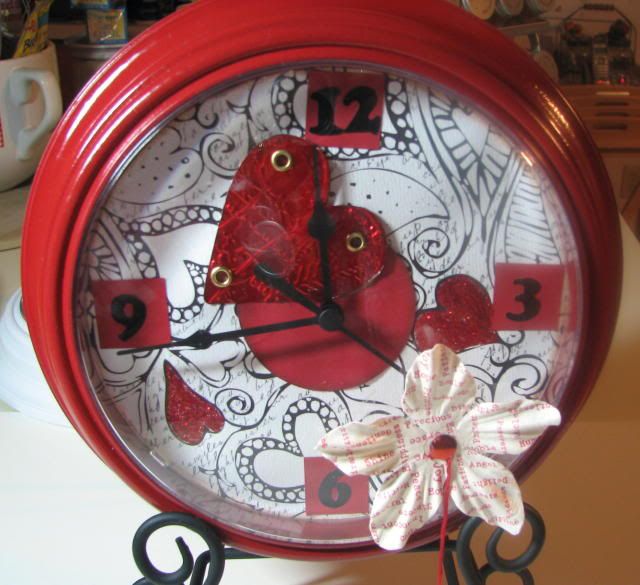
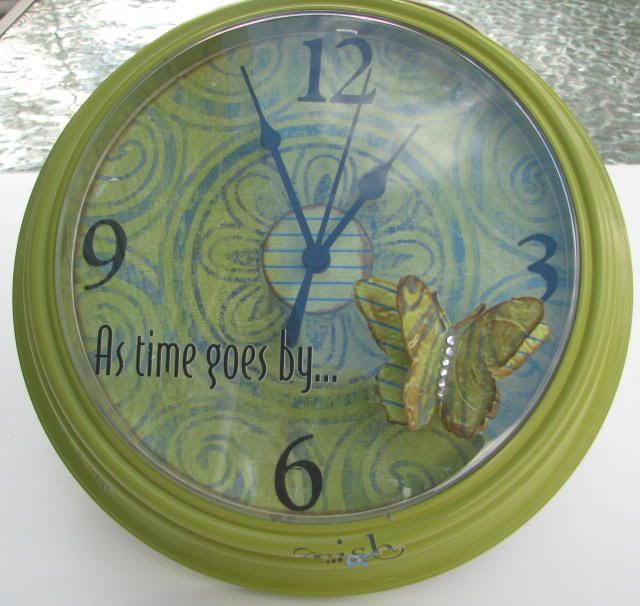
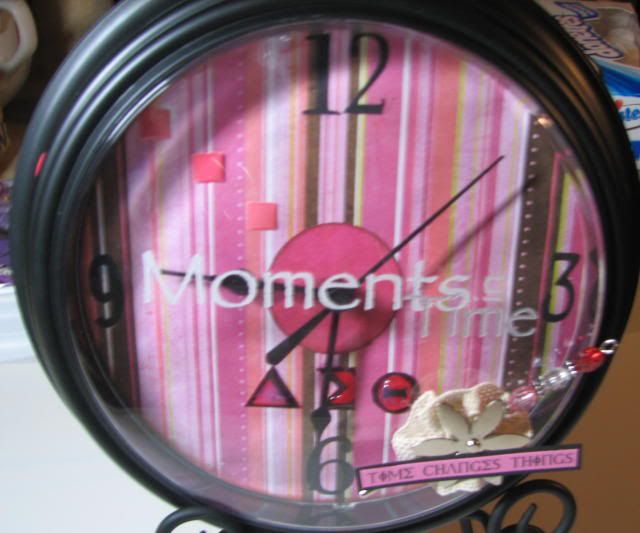
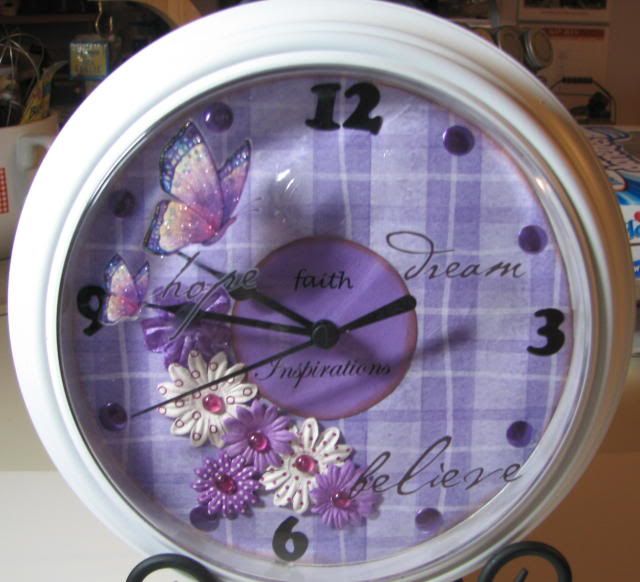
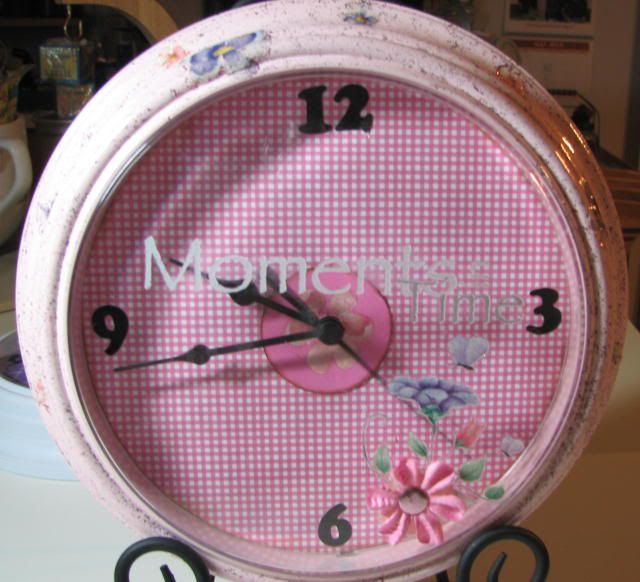
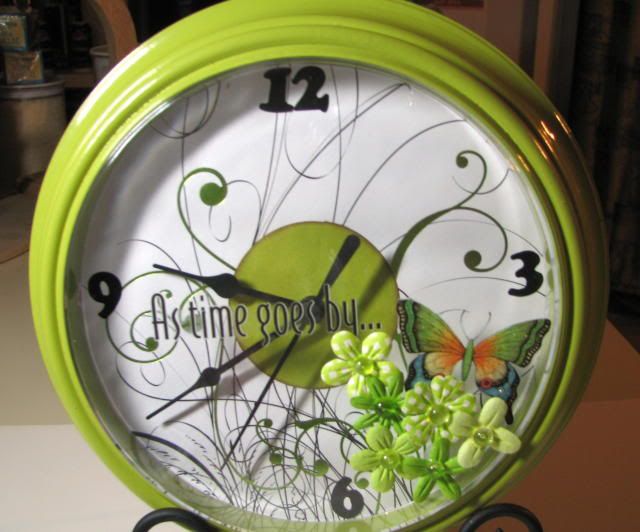
When I posted the altered clock( at this time I had only completed one), someone wanted to know if I had instructions and I said, "not really"...Several of the ladies on the MB gave me a few pointers and Boy, I appreciate your help. Someone else asked if they could also have the instructions; another person asked how long it took to alter the clocks. I almost completed seven of the clocks and it took me most of the day with out visiting the MB...(Hehe) "Now, that was a challenge". The hardest part about the altering was spray painting and waiting...Though the paint dries fast you still want to wait for at least an hour for the paint to cure.....So I set them close to my floor heat ducts so that they were in the direct flow of the warmth. That speeded up the process......I did have to ask questions initially on the MB and got great feedback from the ladies when taking the clock apart. I actually damaged the first plastic cover I took off of the clock...So yes, this was a learning experience for me.....After the first clock, the process was pretty easy and does not take much time at all....... The time is in how much detail you are puting on each clock.....But here are a few tips, I learned, to help you alter your clock(s).....
1. There are two small slits,(one just a little bigger than the other), on the back of the clock that holds the plastic cover. Push both in using a small flat tip screwdriver and it pops the cover. (It should now be easy to remove.)
2. Carefully remove the hands of the clock. The second hand is on the top and it is sorta snapped on in the center of the post. The minute hand (longer) is in the middle and the hour hand (short) is on the bottom....Remember this in replacing them so that you put them back on correctly. Be careful as to not bend them or break them when removing. They are very thin plastic and must be straight when replaced or they wil not rotate properly.
3. Carefully remove the face of the clock. (It is very thin Cardstock but has quite a bit of tape on it....I carefully removed mine because I thought they would make a great backdrop for a Layout. Place the face of the clock (cardstock) that you removed from the clock on printed paper of your choice. Trace the circle onto the printed paper. Cut out the cirle. I skipped the tracing part and cut the circle using an exacto knife.
Also remember to cut the middle circle ......
4. Paint the shell of the clock, if desired. I spray painted most of mine.....
5. Place the printed paper on the clock. I used my ATG gun.
6. I used stickers for the "12", "9", "6", "3"....They came in handy....And after cutting numbers for two of the clocks and using my Zig to glue them on the printed paper ......a light bulb went off.......So I eliminated this step and pulled out the good ole stickers....I knew I kept them for a reason (Hehe...) You may want to use all the numbers 1-12 or just ticks or straight marks so start by placing the 12, 3, 6, 9 first and then add the other numbers, ticks or straight marks.
7. Replace your hands .......If you are going to decorate the face of your clock do it before replacing the hands....that way you can test it to make sure there is enough clearance so that your deco does not stop the hands from rotating .
Remember, replace the short hand, then the long hand ( they should be replaced securely on the post or stem of the clock.....and finally the second hand, which sorta snaps in the middle of the post or stem ( Do not press the second hand down too far in the stem or it will not rotate...)
Place battery in the clock and test for clearance...If you have completely decorated the face of your clock; replace the plastic cover. Remember to snap it back into the two slits to securly hold it in place......
If desired deco your cover. I found it easier to deco the plastic cover first and then replace it on the clock......
I hope the instructions are "clear as mud".......and will make your experience with altering a clock quite a bit easier than my first one....


 Click on the Blinkie and see Jeannie Phillips amazing creations.


10 comments:
As usual, Ms. Dee, your work is amazing! I know everyone will love their clocks!
I love them!! I really want to try some of these. SJh20ski
TFS .. the clocks and all the cool ideas and tips....I think I will try to make a clock for christmas...gifts thank you...
happykimber1
Awesome awesome awesome awesome!!! These are fantastic!!!
I really love the last one!.. Wow that is pretty!
Ms. Dee
Now I know I have to try my hand at this. I really love your clocks. I know the people you made those clocks for are really gonna love them. Great Job!!!
Gin
Dee, your clocks are just the best! I love all the butterflies on them! Great job as alwasy SIS!
Wow Dee! These are fantastic! Great instructions just in time for Christmas. I'm definitely gonna try some of these. Thank you sooo much for the tips. Hugs, D
these are wonderful! I've done a couple and never thought to decorate the outside before! You can also cut your circle with your E at 7 3/4 I believe it is.
GORGEOUS WORK!!!
Post a Comment